Schleicher Ka8b

Schleicher Ka8b

The Ka8 was built in 1957 and is my first scale glider build, the plans were bought through a company called Belair which also did the laser cut parts for me.

1071575glider pic
Product details

This model is a 1/4 scale glider with a 4mtr wing span, using all mini Hitec servos.

The radio gear will be Futaba 2.4 equipment, ad covered in solatex.
The glider is made up with spruce strips that came from Slec cut to lenghts that was required, they were the only people I could find to do this.

The colours will be the same seen in this picture, all decals will be done by pyramid models.
Stage 1
 Fuselage Jig
Gliders have a whole different style of building, as I found out on my first ever glider the Ka8.
This was the first time I had to make a jig before starting the build on the fuz
P210210_17.100002

The jig board was made from mdf board with some 50mm x 25mm soft woodThe groves or channels that can be seen in this picture will take the formers to allow the build, reason for this is the glider does not have a flat bottom.
So the only way of getting a squareness on the structure is by creating a jig such as this, which is a good few hours.
So don't rush this part because a good jig will allow a good and true fuz to be built.
You will need to give your self a centre line on the table to start with and with that all measurements will run from this line
This will need to be cut true so the set square can be used correctly

And a set square to draw the line across.
 I used any old scraps of ply to create the bits you see.
You can see all pieces of the jig were carefuly marked to get it all square
 
Stage 2
Building the Ka8 fuz


There's not a lot of wood to build this fuz it's mainly

The centre wing formers also now fitted Start of the fuz coming together, the formers can be seen slotted in to the jig. I was surprised how quickly this frame came together

This was the first laser cut part kit that I have had from Leon of belair kits, It was very nice to have all the pieces cut and fitting together like a glove.

And being my first glider build was I think a good way to go until you get the idea on how the glider are put together.

P270210_17.430001

COCKPIT BUILD

The dash is made from some 2 sheets 0f 1/32 ply some clear sheet and photo copy dials. holes punched out then varnished.

The brass frame work is made from brass box section, this bends realy nice a round a jig, then stuck to the canopy

Lower Floor and upper floor fitted


WING BUILD

The centre spar is made from balsa side sheeting either side and spruce top and bottom tappered pieces, the spruce for the spar's was bought from Slec. Slec was the only company  found as a supplier for spruce at the lenghts I required. The sheet was 2mtrs long by 50mm wide, this ment that I could cut two lenghts using sides as a straight edge, so only one cut was required for each piece.
P170411_18.280003

Air brakes are shown here being fitted

If I had to make these air brakes again,I would make them out of fibre glass board because what I found with the ply it would go out of shape, cause was the ply sheets that was used was to thin.


COVERING THE FUSELAGE

 Start of the covering is done to the top section of the glider,
the covering used is clear solatex but before put the covering on , the fuz requires covering with Balsa loc.
this is required because of the lack of surface that the covering has to stick too. It can be seen on the top formers that the covering has stuck to them. The Balsa loc re-activates when the heat of the iron is laid on to the covering
 A problem has occured at the nose section to the canopy, this can clearly be seen as the texs drops lower then the formers, I had a go at covering this secton a couple of times and even sanded down the middle former, but this did not correct the problem.
So a call was made to a friend, and as usual a solution had been sorted.
P060411_19.390001
Then I re-covered the nose section with balsa loc and left over night for re-covering Now for the paint job on the fuz
P220511_19.280004

I have changed my mind on the colour scheme, the reason behind this was I have a favorite colour scheme and I have 3 planes done in it so far. Here is some of the decals now fitted and the transporting frame being built Have to keep the tail still as twisting of the fuz can occure when being transported. dihedral plates are fitted to the wing brace ready for the wings to be fitted and set up before glueing.

P170411_17.360002

Never thought the shed was a bit small till I put the wings on my 4mtr Ka8b glider.    Pilots in, just requires some face paint.

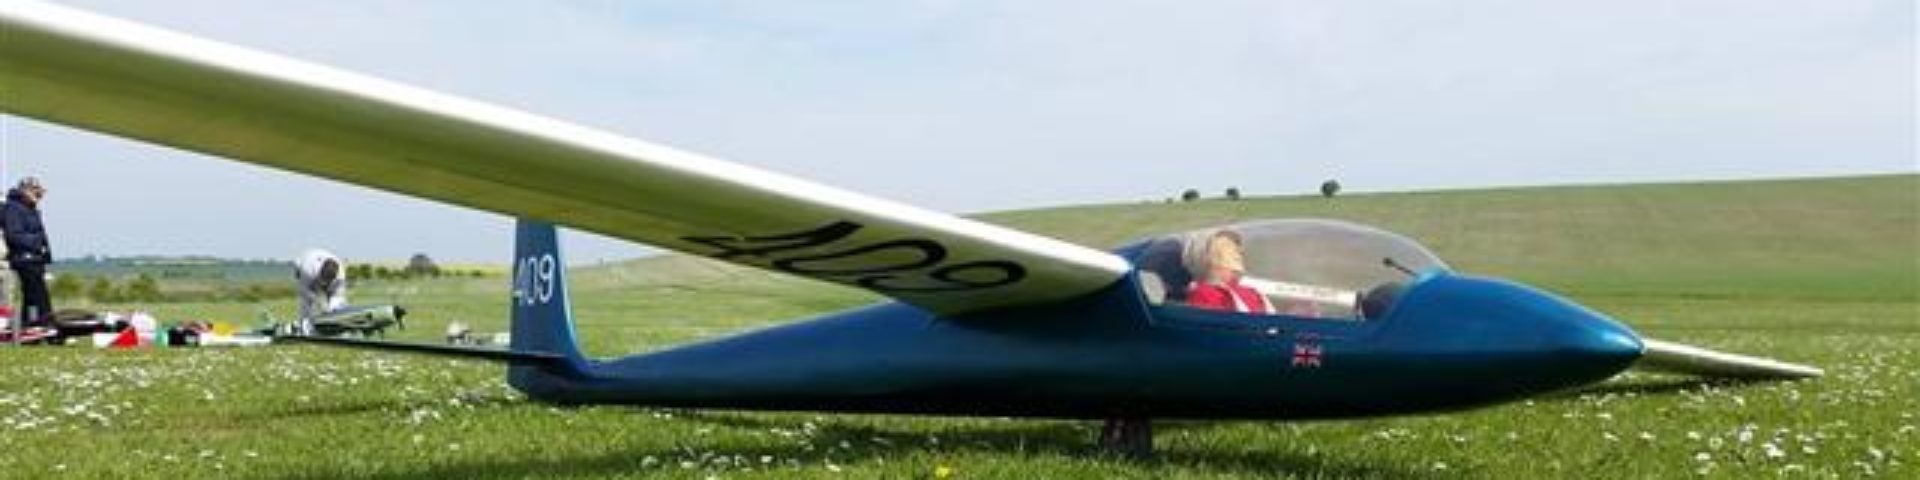
Finally finished c/g done, already for its maiden flight, can't beleave after 2 years building it's done

P110611_19.010001

These photo's have been taken after the first days flying that included 6 succesful flights, thanks to the Ghost Squadron while we are here at Belle-Vue in devon

 The first flight was a great filling there was Tony on the tug and John on the Ka8b, A nod from tony to John and a return nod from John and of they went.
It went up quite true after a notch  on the left alleron , then John gave me the transmitter and I was of my first flight with the glider that took me two years to build.
After about 25  minutes it was time to land, and thanks to John with some helpful instructions the Ka8b landing nice and smooth.
I would like to thank John and the Ghost Suadron for all there help,
John
Little Al
Ivan
Pat
Tony
Thanks again !!!!!
 
While I was scaning the internet I came across A pair of Ka8 gliders in Switzaland that get towed up together with one tug pulling them and then the use smokes with the flying.
The registration of the one I'm now doing is OE-0947 below is the real one.
1081134 glider pic 3

Now for some  Ka8b duo glider tug and flying

20070922_422gli